When getting back in to OS Development, I have always begun by setting up a GCC Cross-Compiler. Reasons for doing so and general methods are discussed at https://wiki.osdev.org/GCC_Cross-Compiler. However, I wanted by dev environment to do a couple of specific things. If you are primarily developing an OS in C++ and want to run in the higher-half, targeting X86-64, then this post may be for you!
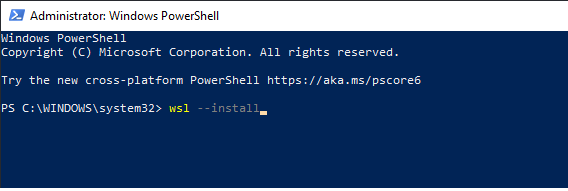
Firstly, I am doing this on Ubuntu on WSL 2 on Windows 10. I believe that this is by far the simplest way for those who are familiar with Windows operating systems to get in to OS Dev. See my article Linux on Windows in 2021 for a really simple way to get WSL 2 installed and set up. I’m using that as my starting point. If you haven’t done so now, run the following commands in WSL:
sudo apt-get update
sudo apt-get upgrade
Of course, the first time you use sudo in any session (or after a timeout), you will be prompted for your password. I know this is really basic stuff for anyone familiar with Linux (especially the Debian-alikes…), but it’s certainly stuff I didn’t know when I started hobby OSDev back in the early 2000’s.
Prerequisites
Before building the cross-compiler, there are a few prerequisites. They’re all really easily installable using “apt”. Let’s get them now:
sudo apt-get install build-essential
This gets the tools WSL needs to compile software – basically we will use the WSL GCC compiler to compile our own version of GCC, suitable for building our own OS. Next, we need some other tools. You can chain these together in a single apt install command, but for clarity I’ll write them out in full. These are all either necessary for GCC compilation or will help us with the compilation process.
If you wish to copy and paste any of the command lines, copy them from your favourite browser as usual, and to paste them in to WSL, simply right click on the WSL window. That’s it!
sudo apt-get install bison
sudo apt-get install flex
sudo apt-get install libgmp3-dev
sudo apt-get install libmpc-dev
sudo apt-get install libmpfr-dev
sudo apt-get install texinfo
sudo apt-get install libisl-dev
Phew! That’s everything needed for GCC / binutils compilation. There’s one other I often do at this point which I will be using to create DVD images for use with an emulator – xorriso. The command is exactly as expected:
sudo apt-get install xorriso
And there we have it! WSL is ready to compile binutils and GCC, which we will need to compile our own operating system kernel!
Getting Binutils / GCC
Next is to download and extract the Binutils and GCC packages on to our WSL machine. Let’s prepare some directories to extract these in to. While we’re talking about directories, you can do some of this stuff from Windows rather than WSL. I strongly recommend you have a look at Accessing WSL Filesystem from Windows.
Whenever you open WSL, you will be at your home directory, located at ‘/home/[username]’ and you can change the current working directory with the same ‘cd’ command you will be used to from Powershell or command shells. so “cd /home/[username]” changes back to your home directory. There is a handy shortcut, though – tilde (~). Typing “cd ~” will bring you back to your home directory. If you have a subdirectory called “projects”, “cd ~/projects” will bring you back there. REMEMBER Linux is case sensitive and “cd ~/Projects” will not work!
So, type the following:
cd ~              # ensure we are starting in our home directory
mkdir build       # create a directory called "build" in the home directory
cd build          # change in to the ~/build directory
mkdir build-gcc build-binutils    # yes, we can create 2 directories with a single command!
At this point, we have all the directory structures we will require for compiling GCC. Note that it is a fairly common thing in Linux circles to compile software out of the source directory. We’ll get to that later, though…
Next, download GCC and Binutils. As I’m writing this in September 2021, the latest versions are 2.37 for Binutils and 11.2.0 for GCC. These download commands will need to be adjusted as there are new versions of GCC and Binutils – I do not intend to update this article each time GCC release a new version! If you have any issues for this at the time of following this article, simply google gnu gcc and gnu binutils and download the latest versions.
For me, in the UK, the appropriate commands are:
wget https://mirrorservice.org/sites/sourceware.org/pub/gcc/releases/gcc-11.2.0/gcc-11.2.0.tar.gz
wget https://ftp.gnu.org/gnu/binutils/binutils-2.37.tar.gz
An alternative, if you have followed Accessing WSL Filesystem from Windows, is to download these files on Windows and then copy them over to “u:\home\[username]\build”.
Next, to extract the gzip archives. From the same command line (we’re still in the “build” directory:
tar -xf g*.gz
tar -xf b*.gz
You can then delete (“rm *.gz“) the .gz files if you want to. Or leave them downloaded in case something gets messed up later!
Next, we want to set up a couple of environment variables in order that we are compiling the correct flavour of GCC and so that Bash (the Linux shell) can actually find our binary files. Remember that these commands are all case-sensitive. I want to reiterate that a lot of this is taken directly from the wiki at wiki.osdev.org – credit where it’s due!
- export PREFIX=”$HOME/opt/cross”
- export TARGET=x86_64-elf
- export PATH=”$PREFIX/bin:$PATH”
The command “export” basically defines environment variables for Bash. The PREFIX is where our cross-compiler will be build – in this case “~/opt/cross”. The $HOME variable is automatically defined for us by Bash. We access any environment variable by prefixing it with “$”.
TARGET is the system we are targeting with our cross-compiler. This could be an ARM variant, x86 variant and so on…
Finally, PATH is where Bash looks for files when you type a command. By adding “~/opt/cross/bin” (or “$PREFIX/bin” – they now point to the same place), when we have compiled Binutils, Linux will be able to find those binaries to compile GCC.
NOTE: If you close the WSL window during this, you will need to re-define these environment variables. We will make “PATH” persistent later in this article.
Next for the actual compilation. A couple of notes here first…
GCC is compiled using the Automake system (or more accurately, the compilation of GCC is managed by the Automake system). What this means is, we call two utilities – firstly we “configure” – this tells the system what our target is, where we want the binaries installed and so on. After a successful configure we can run make to actually run the compilation.
The directory we run configure from is important, as that will be the working directory for the compilation. Although configure is stored in the gcc / binutils directory we just extracted our “.gz” files to, it is not best practice to run it from there.
Compiling Binutils
This is nice and easy! Remember to set the environment variables first. We will change in to the empty directory we created earlier, then run the configure. Also pay attention to the binutils version number when running the configure command – you may have to update that to binutils-x.xx!
- cd ~/build/build-binutils
- ../binutils-2.37/configure –target=$TARGET –prefix=”$PREFIX” –with-sysroot –disable-nls –disable-werror
Now, configure will run in out build-binutils directory and will create a Makefile for us. This should only take a few seconds on a modern PC. If you type “ls” you will see the files that configure has created for us. Finally:
- make all install
will run “make all” “make install” and you will end up with your target binutils installed at “~/opt/cross/bin“. This compilation may take some time.